(recipe source: adapted from Sonia with minor changes)
makes 9 cupcakes Chiffon cake
3 egg yolks
20g sugar
35g corn oil
60g milk
70g cake flour
3 egg whites
25g sugar
Filling
60g dairy whipping cream
10g sugar
1tsp instant custard powder
Icing sugar, for dusting
Method
1. Pre-heat oven to 170C.
2. Arrange paper liners on baking tray.
3. Hand whisk egg yolk and sugar till pale in colour.
4. Add in corn oil and milk, mix well.
5. Sift in cake flour, stir to combine.
6. Beat egg white until foamy, gradually add sugar, and continue beat till soft peak form.
7. Take 1/3 of egg white and use a hand whisk to mix into egg yolk batter.
8. Fold in the balance egg white with a spatula till well combine.
9. Scoop batter into pre-arranged paper liners to about ¾ full.
10. Bake for 20-25 mins at middle rack.
11. Beat whipping cream with sugar till firm and stiff (over a bowl of iced water).
12. Add in custard powder, mix well.
13. Pipe custard cream into cupcake and dust with icing sugar.

Hokkaido Matcha Cupcake Recipe
adapted from 巧思空间
Egg yolk batter:
4 egg yolks
40g corn oil
40g fresh milk
1/4tsp rum
50g cake flour
2tbsp chopped kidney beans(drained of syrup)
Meringue:
5 egg whites
60g caster sugar
1/4tsp lemon juice
Filling:
Beat 200g whipping cream with 30g icing sugar, then spoon in 1tsp matcha powder.
Method:
1. Preheat the oven to 160℃.
2. Beat the egg yolks and add in corn oil, fresh milk and rum. Mix evenly.
3. Sieve in the flour and mix evenly to form an egg yolk batter. Mix in the chopped kidney beans.
4. Beat the egg whites until soft peaks form, then add in the lemon juice. Add in the sugar in 3 times, and beat the meringue until hard peaks form.
5. Scoop in half the meringue into the egg yolk mixture and fold in with a spatula.
6. Pour the evenly mixed mixture back into the remaining meringue, fold in evenly. 7. Pipe the batter into square paper cups. Bake in the oven for 18 - 20 minutes.
8. Allow the cakes to cool. Once cooled, pipe the matcha filling into the cake until some of it squeezes out. (It doesn't matter if you turn the cake upside-down or not, because after you pipe in the filling, the shrinked cake will return to original size.) 9. Decorate with kidney beans and icing sugar.

巧克力小餐包
食谱摘自: carol 老师(稍作更改)
可做16个面包
材料:
A 高粉290克
可可粉10g
细砂糖30克
盐1/4茶匙
即溶酵母粉1/2茶匙
鲜奶200毫升
B 无盐黄油30克
表面装饰 :蛋白液和一些金瓜籽
做法:
1。除奶油之外,将全部材料放进面包机里。
2。搅打成团后,加入奶油搅打至扩展阶段,进行基础发酵60分钟或至2倍大。
3。基础发酵结束后,将面团取出排气后,分割出各16等分,滚圆,盖上干净布休息10分钟。 4。休息好的面团表面洒些手粉避免沾粘
5。擀成圆形然后翻面,中间放上3-4片巧克力片,收口捏紧滚圆
6。8" x 8"方型烤盘铺上一层防沾烤紙,小面团间隔整齐放入烤盘中
7。整盘放入烤箱中,面团表面噴些水然后盖上烤箱门,进行最后发酵约40分鐘。
8。当最后发酵完毕,将面团从烤箱拿出,预热烤箱至180度c。
9。在面团表面涂抹一层薄薄的蛋白,铺上金瓜籽
10。 放进已经预热烤箱中烘烤20-22分钟即可
巧克力花生酱花环面包(Wreath Chocolate Peanut Butter Bun)
可做1个直径21cm面包(yield 1 21 cm bread)
材料: Ingredients :
A
高粉300克 Bread flour300g
细砂糖30克 Sugar 30g
盐1/4茶匙 Salt 1/4 tsp
即溶酵母粉3克 Easy-bake yeast 3g
牛奶150克 Water 150g
B 无盐黄油25克。Unsalted Butter 25g
C 内馅: 适量的巧克力酱+ 花生酱 Filling : Some chocolate syrup + peanut butter
D 表面装饰:蛋液适量 surface decoration : some eggs wash
做法:Method :
1。 材料A 全部混合,先用慢速搅拌成团,再用中速搅成稍具光滑状。 1. Mix ingredients A into a dough using low speed, then use medium speed to knead it into a shiny and smooth texture.
2。 加入无盐奶油用慢速搅入,再用中速搅成可拉出稍透明薄膜的面团。 2. Add in the unsalted butter, then knead it using medium speed until it forms dough that can be stretched into a thin, translucent membrane.
3。 面团放入容器内并盖上保鲜膜,进行基本发酵约60分钟,至面团膨胀至二倍大。 3. Proof the dough for about 60 minutes.
4。 取出發酵完成的面团,以手轻压排出空气后,將面团分割成4等分后分別滾圆,盖上湿布休面15分钟。 4. Divide dough into 4 equal balls, then allow to proof for another 15 minutes.
5。 將每一份面团擀开成直径約23cm,厚度約1cm的圆形。取一张在表面均勻涂抹巧克力花生醬,盖上另一张面皮,接著再抹上醬料,再盖上另一张面皮,如此作法再重复至完成4张面皮。 5. Flatten one of the dough into a round shape with diameter 23cm and thickness 1cm. Spread some filling on it. Place another flattened dough on it, spread the filling and repeat the steps until all the dough has been spread.
6。 最后用一个直径約21cm的小盆或盤子,倒扣在面皮表面,用刮板或小刀將边沿切割下來,成为一个整齐的圆形。 6. Place a bowl with diameter 21cm on the center of the dough. Use the scrap board to cut it into a neat round shape .
7。 在中央处倒扣一个小杯子,再用刮板先划出8道切口(中间处不割开)。再於每等分中间划出一道切口,一共有16道切口。 7. Place a small cup on the center of the dough, use the scrap board to cut it into 8 parts(the center remains uncut), then cut again in between to get a total of 16 parts
8。 最后2小段一组(共8组),每小段面团都往反方向,扭转二圈,再兩兩一組把底部捏合起來即可。 8. Pair up every two parts into a group(altogether 8 groups). Twist each part of a group twice, in opposite directions, then combine them at the base. (see picture for expected results)
9。 表面刷上一層蛋液,放入已預熱至170℃的烤箱內,烘烤約30 分鐘,至表面呈現金黃色即可。 9. Brush egg wash onto the bread. Bake in a preheated oven at 170°C for 30 minutes or until it turns golden.


鲜奶油面包 (Cream Bun)
食谱摘自孟老师的100道面包(第43页)
可做2个面包(yield 2pcs)
材料 :
A:
高筋面粉200克 Bread Flour 200g
细砂糖30克 Sugar 30g
盐1/4 茶匙 Salt 1/4tsp
即溶酵母粉3克 Easy-bake yeast 3g
蛋黄1个 Egg yolk 1
动物性鲜奶油100克 Whipping cream 100g
鲜奶40克 Fresh milk 40g
B:无盐奶油20克 Unsalted Butter 20g
酥松粒(装饰):Butter crumb(Topping):
无盐奶油 40克 Unsalted Butter 40g
糖粉 30克 Icing Sugar 30g
低筋面粉 50克 Cake Flour 50g
奶粉5克
Milk powder 5g
做法:
1。 材料A 全部混合,先用慢速搅拌成团,再用中速搅成稍具光滑状。
2。 加入无盐奶油用慢速搅入,再用中速搅成可拉出稍透明薄膜的面团。
3。 面团放入容器内并盖上保鲜膜,进行基本发酵约80分钟。
4。 面团分割成6等份,滚圆后盖上保鲜膜,松弛约15分钟.
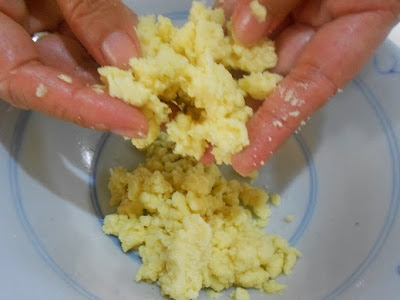
5。 面团整形成长约28 公分的长条形,再编程辫子状,盖上保鲜膜进行最后发酵约30 分钟。 6。 酥松粒:糖粉,低筋面粉及奶粉混合均匀,用手轻轻搓成均匀的细小颗粒。
7。 面团表面刷上均匀的蛋液,再撒上均匀的酥松粒。 放入已预热的烤箱中,以上火190°C,下火160°C 烘烤约20分钟。 酥松粒Butter crumbs


No comments:
Post a Comment